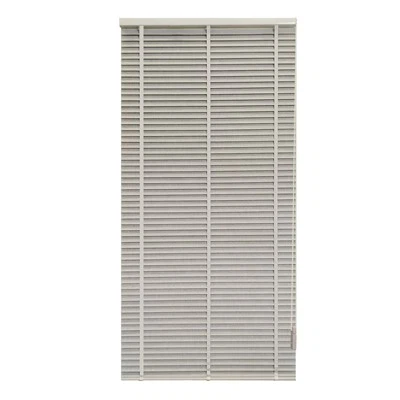
Replacing the cords on aluminum venetian blinds can seem like a daunting task, but with the right guidance, it's a manageable DIY project. As a leading supplier of Aluminum Venetian Blind, I've seen firsthand the importance of maintaining these blinds to ensure they function properly and look great. In this blog post, I'll walk you through the step-by-step process of replacing the cords on your aluminum venetian blinds.
Why Replace the Cords?
Before we dive into the replacement process, let's understand why it might be necessary to replace the cords on your aluminum venetian blinds. Over time, cords can become frayed, tangled, or broken, which can affect the functionality of the blinds. Frayed cords can also pose a safety hazard, especially if you have children or pets in the home. Additionally, replacing the cords can give your blinds a fresh look and extend their lifespan.
Tools and Materials You'll Need
- New cords: Make sure to choose cords that are the right length and thickness for your blinds. You can find replacement cords at most hardware stores or online.
- Scissors: You'll need a sharp pair of scissors to cut the new cords to the appropriate length.
- Pliers: Pliers will come in handy for removing the old cords and attaching the new ones.
- Screwdriver: Depending on the type of blinds you have, you may need a screwdriver to remove the end caps or brackets.
- Ladder: If your blinds are installed high up, you'll need a ladder to reach them safely.
Step 1: Remove the Blinds from the Window
The first step in replacing the cords is to remove the blinds from the window. This will make it easier to work on them and prevent any damage to the window or the blinds themselves. To remove the blinds, simply lift them up and out of the brackets or clips that hold them in place.


Step 2: Remove the Old Cords
Once the blinds are removed from the window, it's time to remove the old cords. Start by locating the end caps or brackets at the bottom of the blinds. Use a screwdriver to remove these end caps or brackets, which will expose the cords. Carefully pull the old cords out of the blinds, making sure to keep track of how they were threaded through the slats.
Step 3: Measure and Cut the New Cords
Next, you'll need to measure and cut the new cords to the appropriate length. To do this, measure the length of the old cords and add a few extra inches to allow for tying knots. Use a pair of scissors to cut the new cords to the measured length.
Step 4: Thread the New Cords Through the Slats
Once the new cords are cut to the appropriate length, it's time to thread them through the slats. Start by inserting the end of the cord through the bottom hole of the first slat. Then, thread the cord through the remaining slats, following the same pattern as the old cords. Make sure to keep the cords straight and evenly spaced as you thread them through the slats.
Step 5: Attach the Cords to the Bottom Rail
After the new cords are threaded through the slats, it's time to attach them to the bottom rail. To do this, tie a knot at the end of each cord and then insert the knotted end through the holes in the bottom rail. Use pliers to pull the cords tight and secure them in place.
Step 6: Reattach the End Caps or Brackets
Once the cords are attached to the bottom rail, it's time to reattach the end caps or brackets. Use a screwdriver to secure the end caps or brackets back in place, making sure they are tightly fastened.
Step 7: Reinstall the Blinds on the Window
Finally, it's time to reinstall the blinds on the window. Carefully lift the blinds up and insert them into the brackets or clips that hold them in place. Make sure the blinds are level and properly aligned before releasing them.
Tips and Tricks
- Take your time: Replacing the cords on aluminum venetian blinds can be a time-consuming process, so make sure to take your time and do it right. Rushing through the process can lead to mistakes and may result in the blinds not functioning properly.
- Keep the cords organized: As you remove the old cords and thread the new ones through the slats, make sure to keep them organized. This will make it easier to keep track of which cord goes where and prevent them from getting tangled.
- Test the blinds: Once you've replaced the cords and reinstalled the blinds on the window, test them to make sure they are functioning properly. Raise and lower the blinds a few times to ensure the cords are working smoothly and the slats are opening and closing evenly.
Other Types of Venetian Blinds
In addition to Aluminum Venetian Blind, there are other types of venetian blinds available on the market. Wood Venetian Blind offer a warm and natural look, while Textile Venetian Blind provide a softer and more elegant appearance. Each type of blind has its own unique features and benefits, so it's important to choose the one that best suits your needs and preferences.
Conclusion
Replacing the cords on aluminum venetian blinds is a relatively simple DIY project that can be completed in a few hours with the right tools and materials. By following the steps outlined in this blog post, you can ensure that your blinds are functioning properly and look great for years to come. If you have any questions or need further assistance, please don't hesitate to contact us. We're here to help you with all your window covering needs. Whether you're looking to replace the cords on your existing blinds or purchase new ones, we have a wide selection of high-quality products to choose from. Contact us today to learn more about our products and services and to start the procurement process.
References
- Home Depot. (n.d.). How to Replace Venetian Blind Cords. Retrieved from https://www.homedepot.com/c/ah/how-to-replace-venetian-blind-cords/9ba683603be9fa5395fab9064652d74
- Lowe's. (n.d.). How to Replace Venetian Blind Cords. Retrieved from https://www.lowes.com/n/how-to/replace-venetian-blind-cords